Playthrough Video (about 9 mins)
About Rusty Laboratory
The "Rusty Laboratory" will provide a mission in the old, abandoned biomedical laboratory. This map will place a variety of concepts, feeling, and gameplay in each room to provide as various experiences as possible.
Areas & Bubble Diagram
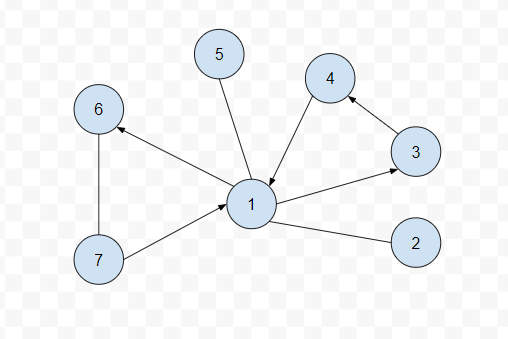
1. Entrance + Main Hall: Start of level; safe—no enemies; this will be a central area connecting other areas and the entrance (exit back) will be locked.
2. Cafeteria: Two combat encounters; introduce Melee enemies; Entering the center of the room will result in the first encounter with one Melee enemy, and if you push the button to unlock the next area, an additional encounter will happen at the exit of the room.
3. Confinement ward: Four combat encounters; introduce the Ranged and Swarmer enemies; divided into several sections within the area (including vertical fight section), so you have to find and press all the buttons to move on to the next area (Lab room); the path back to the main hall closes off somehow.
4. Lab room: Two combat encounters; introduce the Heavy Enemy; the path back to the confinement ward will be blocked when you enter into this area as same as the previous area; allows you to return to the main hall through keys (or buttons) found in this area (one-way).
5. Director's office: One combat encounter; No encounter when you enter the area; once you press the button to unlock the next area at the hidden room inside of this area, one Ranged enemy and few Swarmer enemies will enter from the entrance of the area.
6. Monitor room: Two combat encounters; the first encounter will be a wave of Swarmers and Melee, then the second encounter will be two Heavy enemies that pop up from nowhere.
7. Storage room: Three combat encounters; there will be all types of enemies; you must find the main entrance key while moving on to the exit on the opposite side of the room
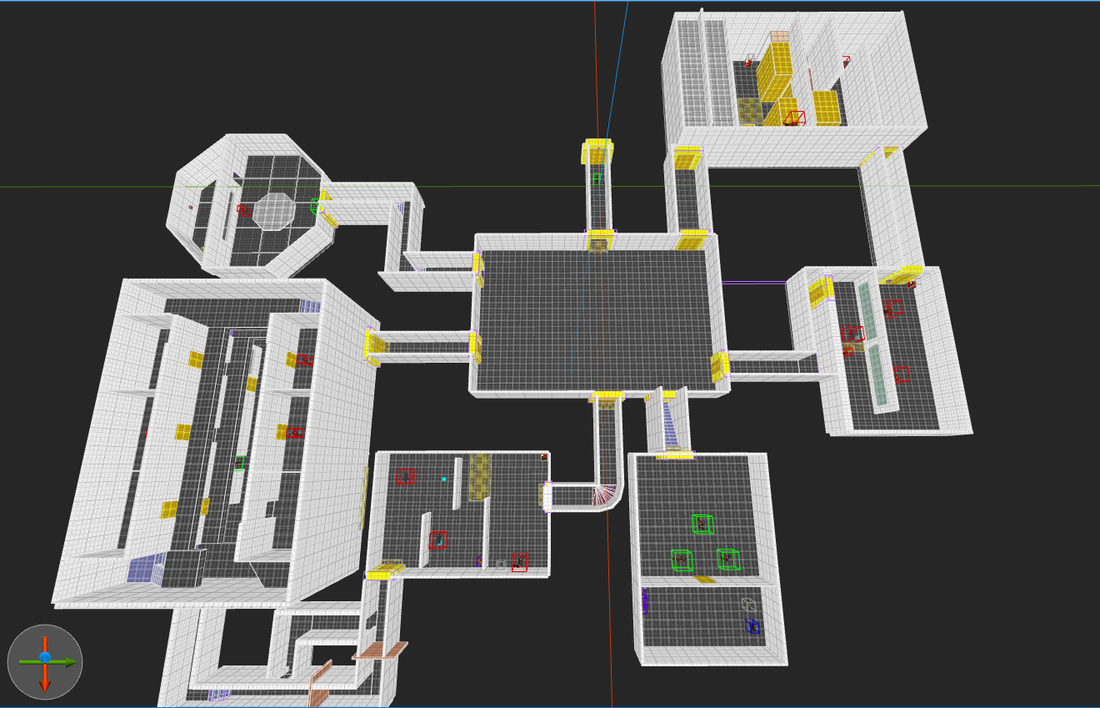
Top Down view
Example images of Area 3: Confinement ward
GreyBox & Gameplay
|
First iteration of the map made by 'trenchbroom' engine in the form of a gray box. For now, there are 7 different areas and each of area has different gameplay experience. Check up some examples of "Area 3: Confinement ward." |
|
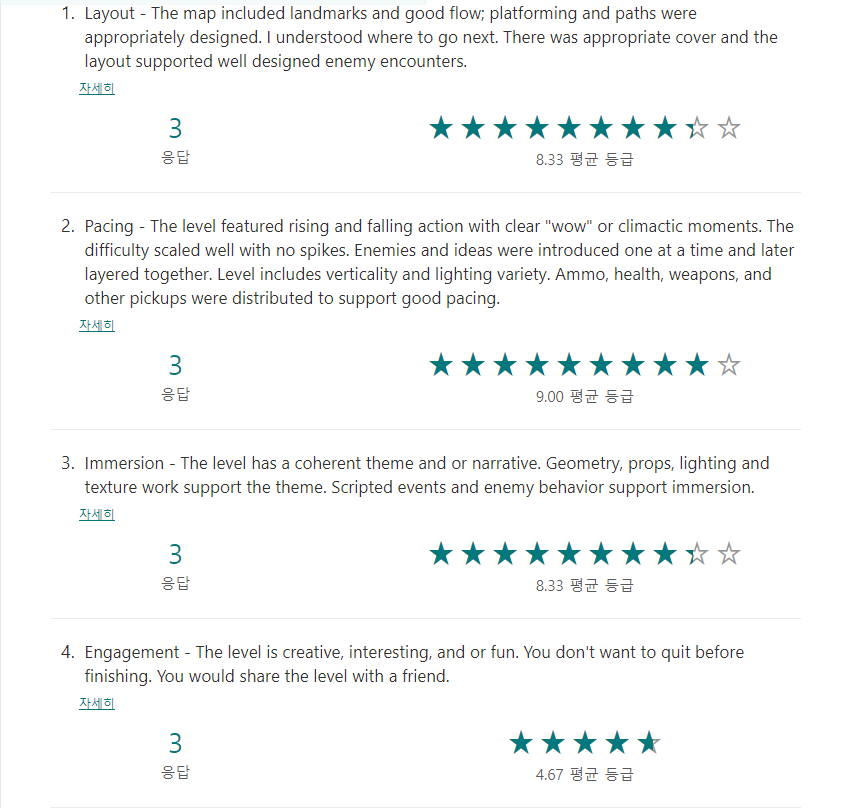
PlayTest
|
The main question I asked when playtesting was difficulty level of progress. The main question I asked when playtesting was the difficulty level of progress. Many times, testers were confused about where to go next and how to proceed with some of the areas. So I have added some dialogue to give platers hints about progress of each areas and guide them with the fill lights. |
Textures & Lighting
Conclusion
Making this level took more effort and time than multiplayer level/map. Clearly, there was a lot of concern that single-player levels/games do not have competition, so I had to make a well-designed level to provide a fun experience. I have changed various factors and conducting playtests with others, such as what experience can provide players with fun, how difficult it is to fight, and whether it is appropriate to combine them all. The unfortunate thing is that there are many things that have changed at the level because the gameplay that I originally wanted to convey through the level doesn't fit the theme, or it can't be implemented due to technical problems.
Want to play my map? Please download the following map file and run it with nQuake.
Want to play my map? Please download the following map file and run it with nQuake.
| rustylaboratory.bsp |
